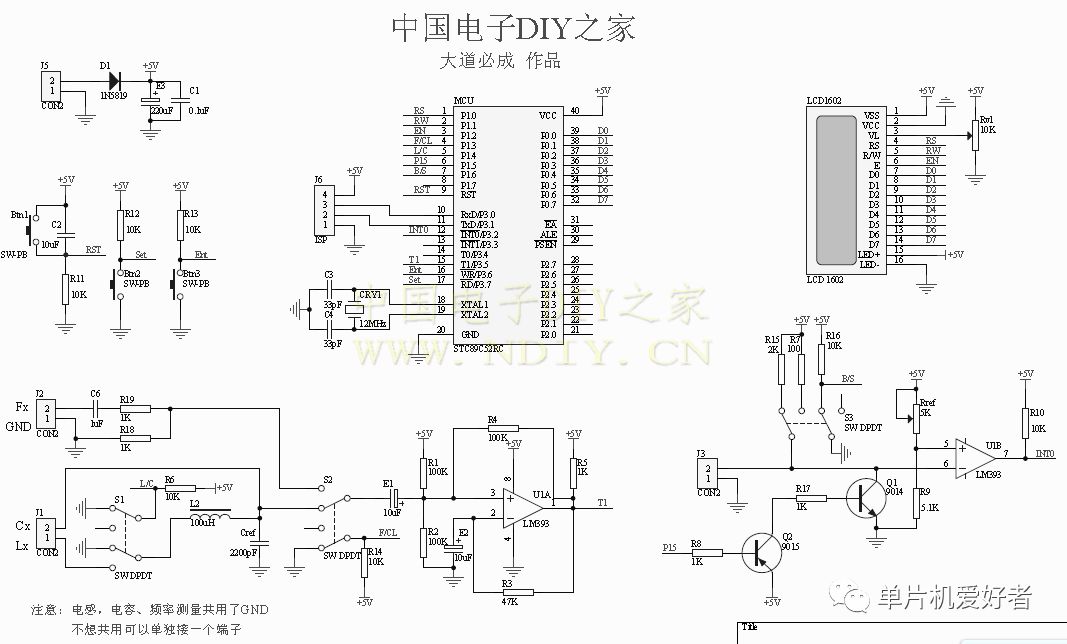
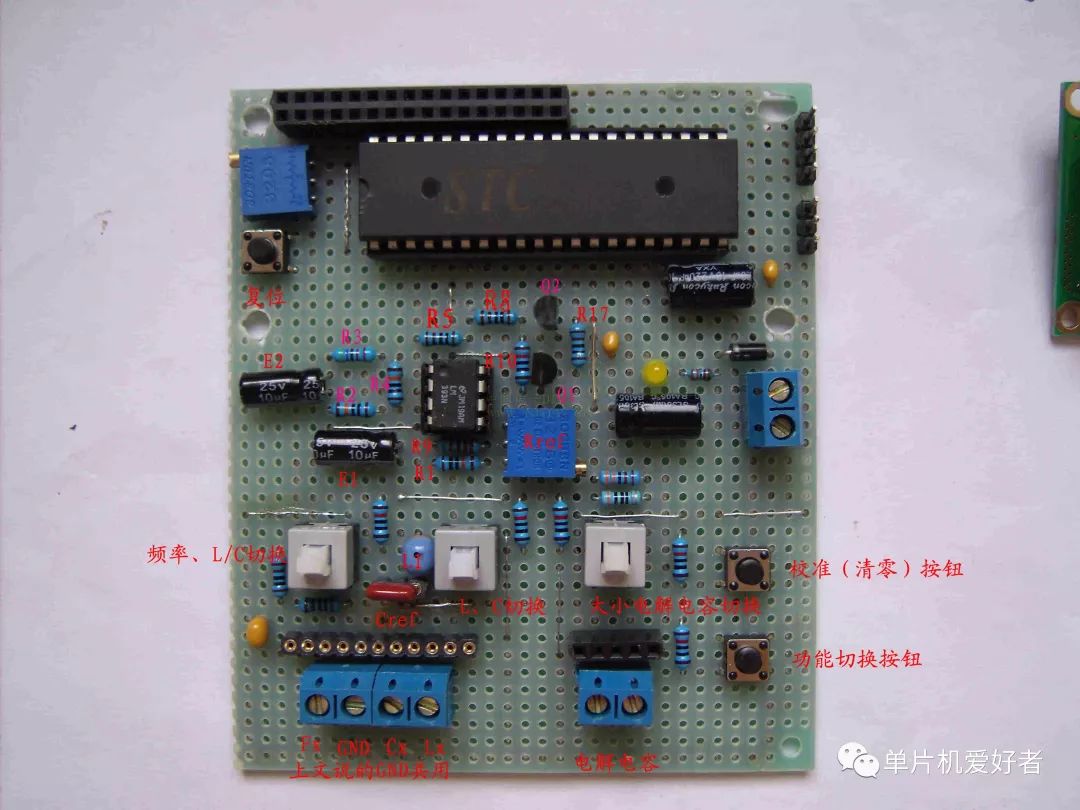
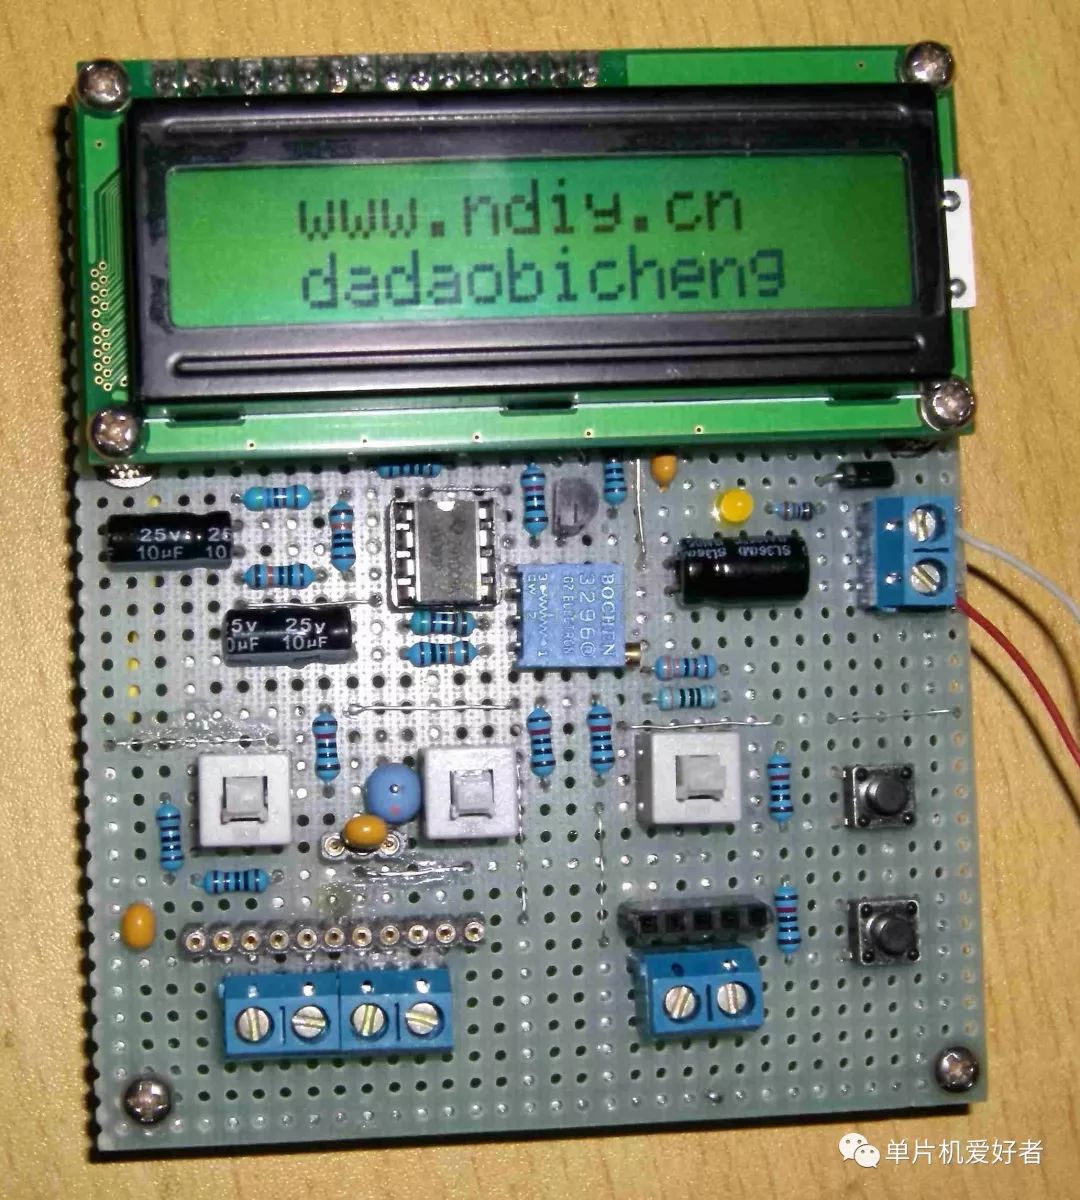
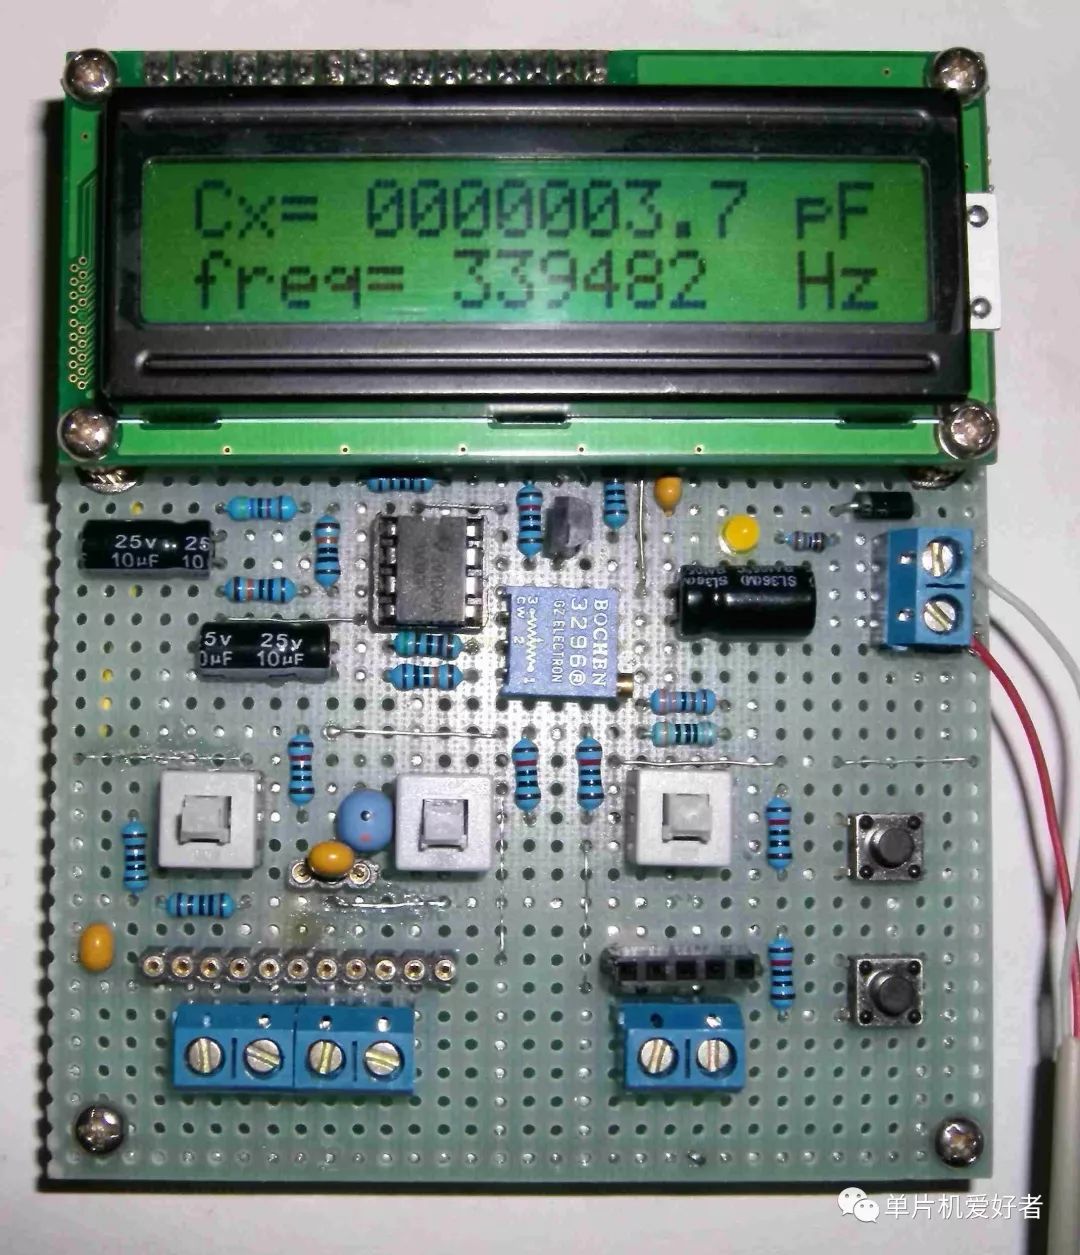
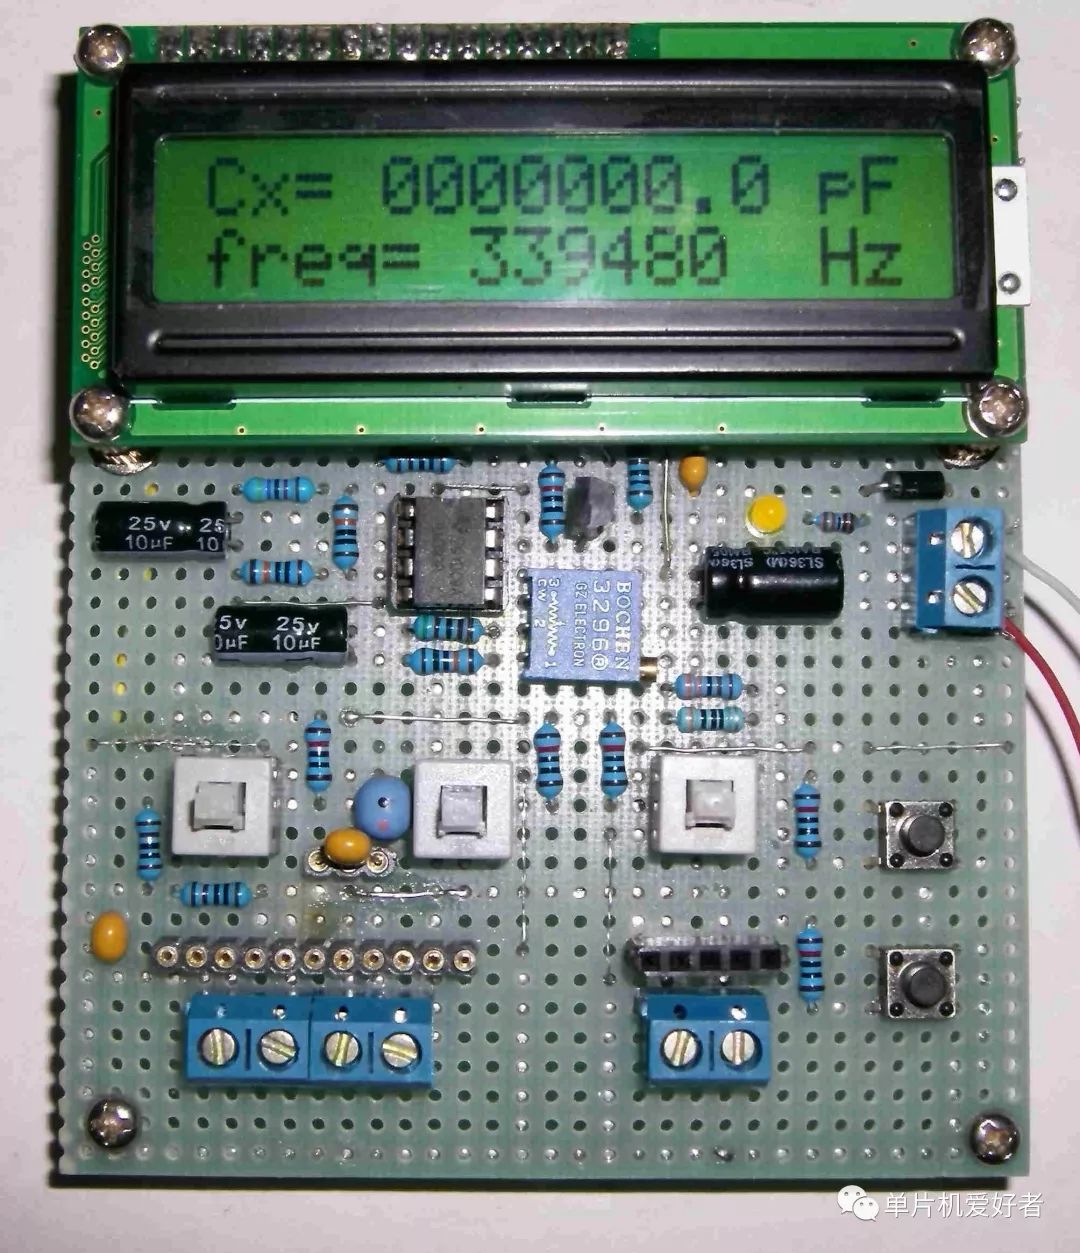
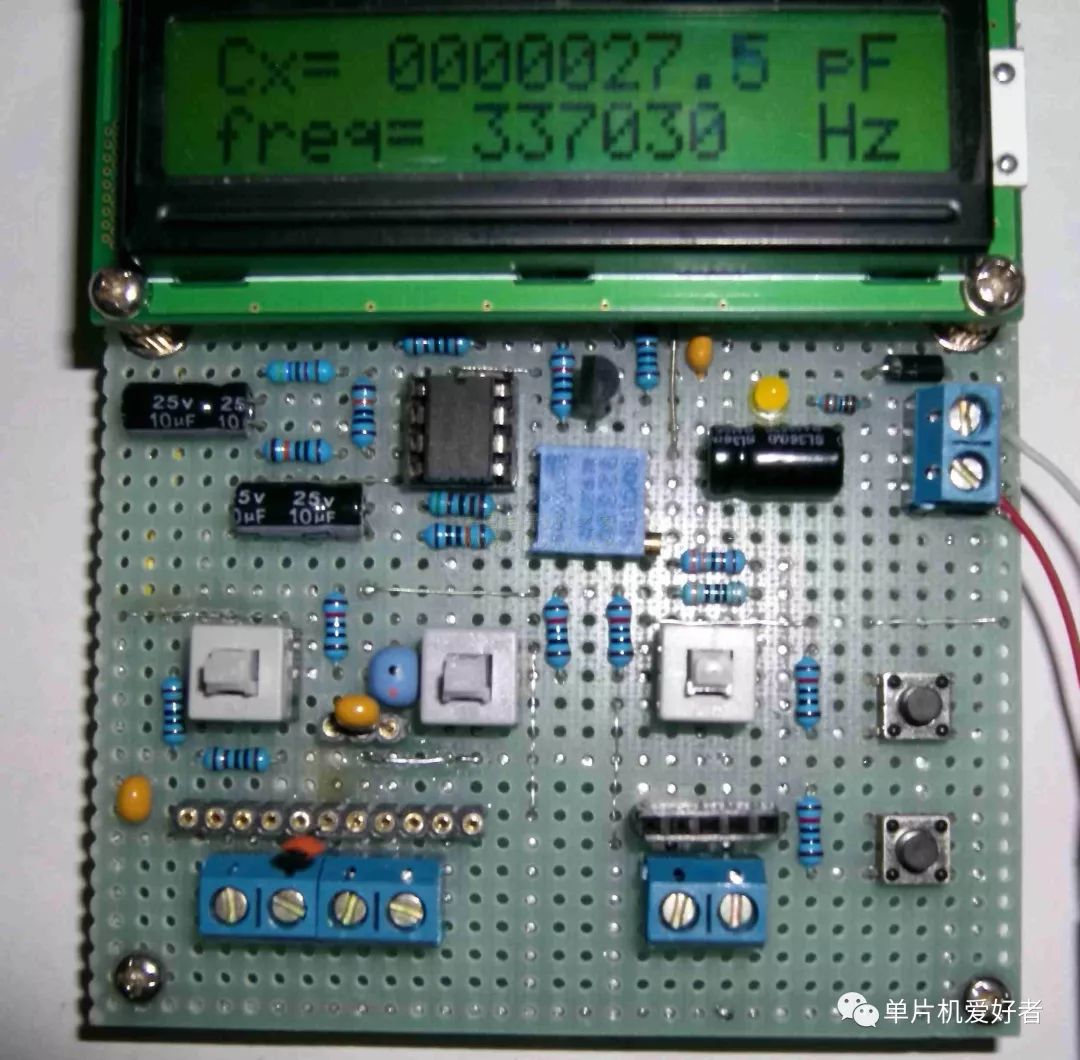
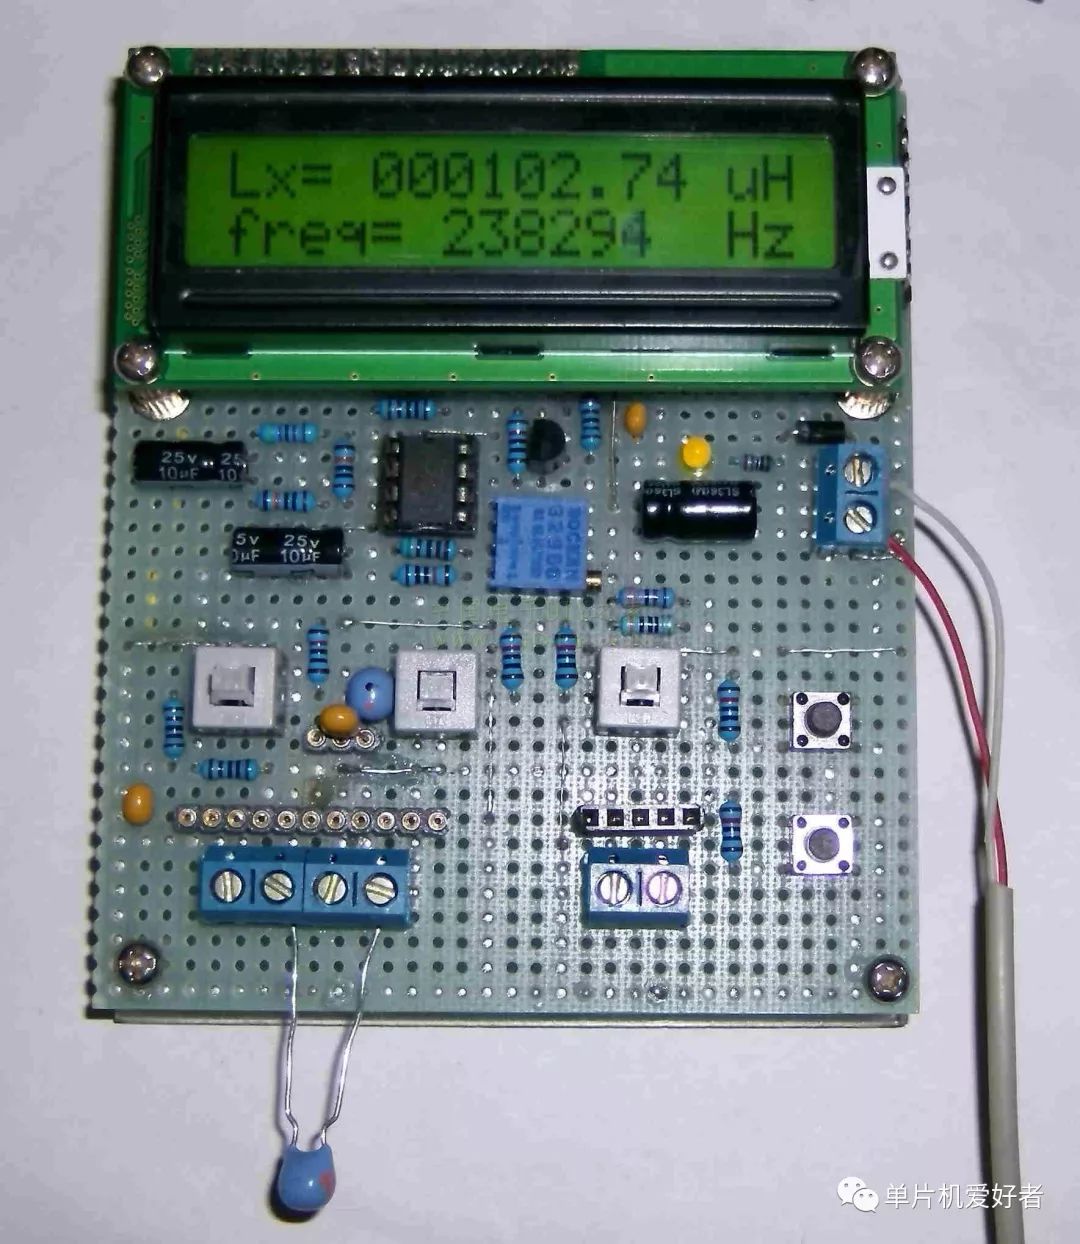
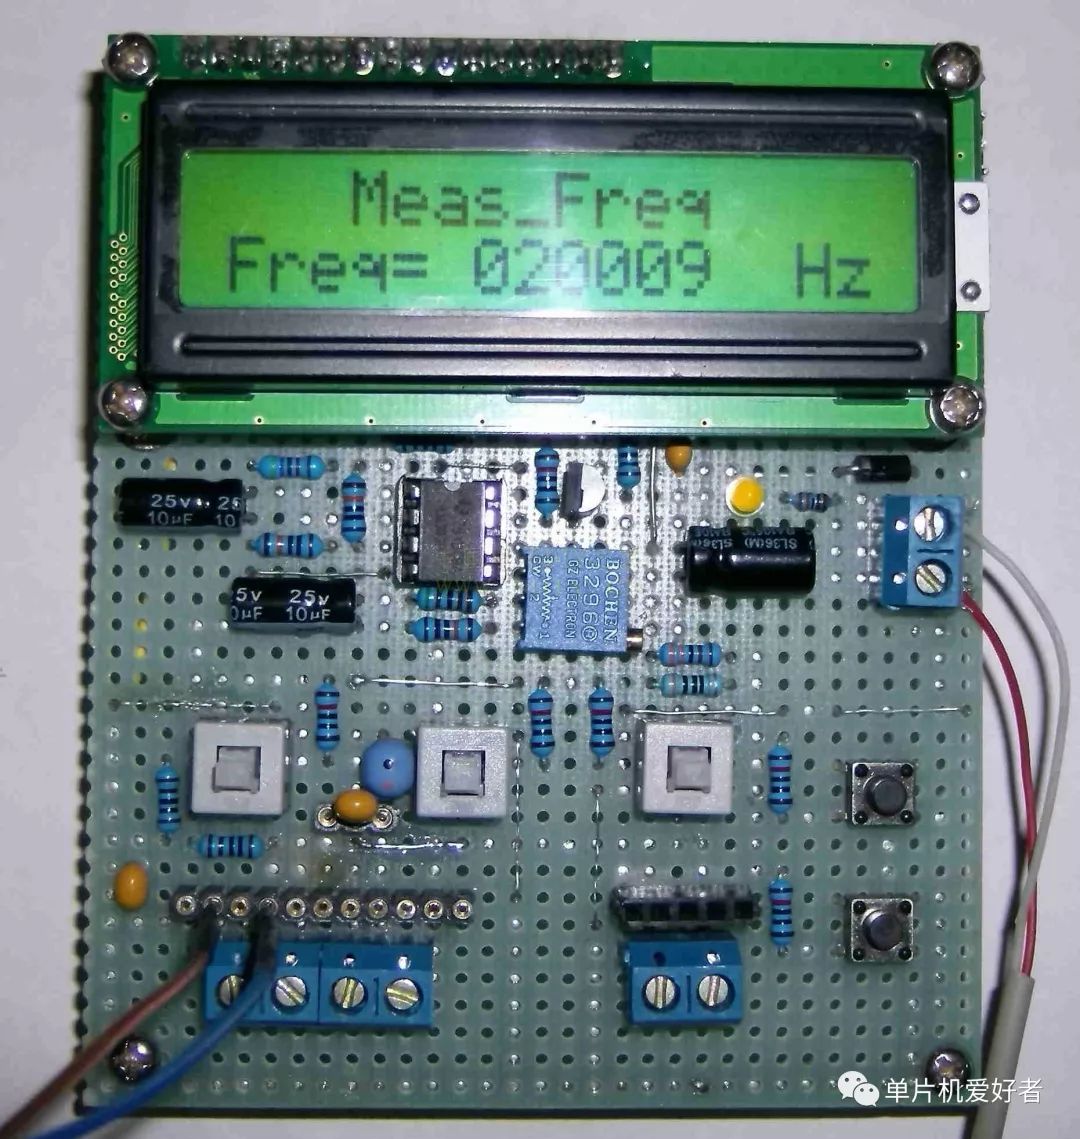
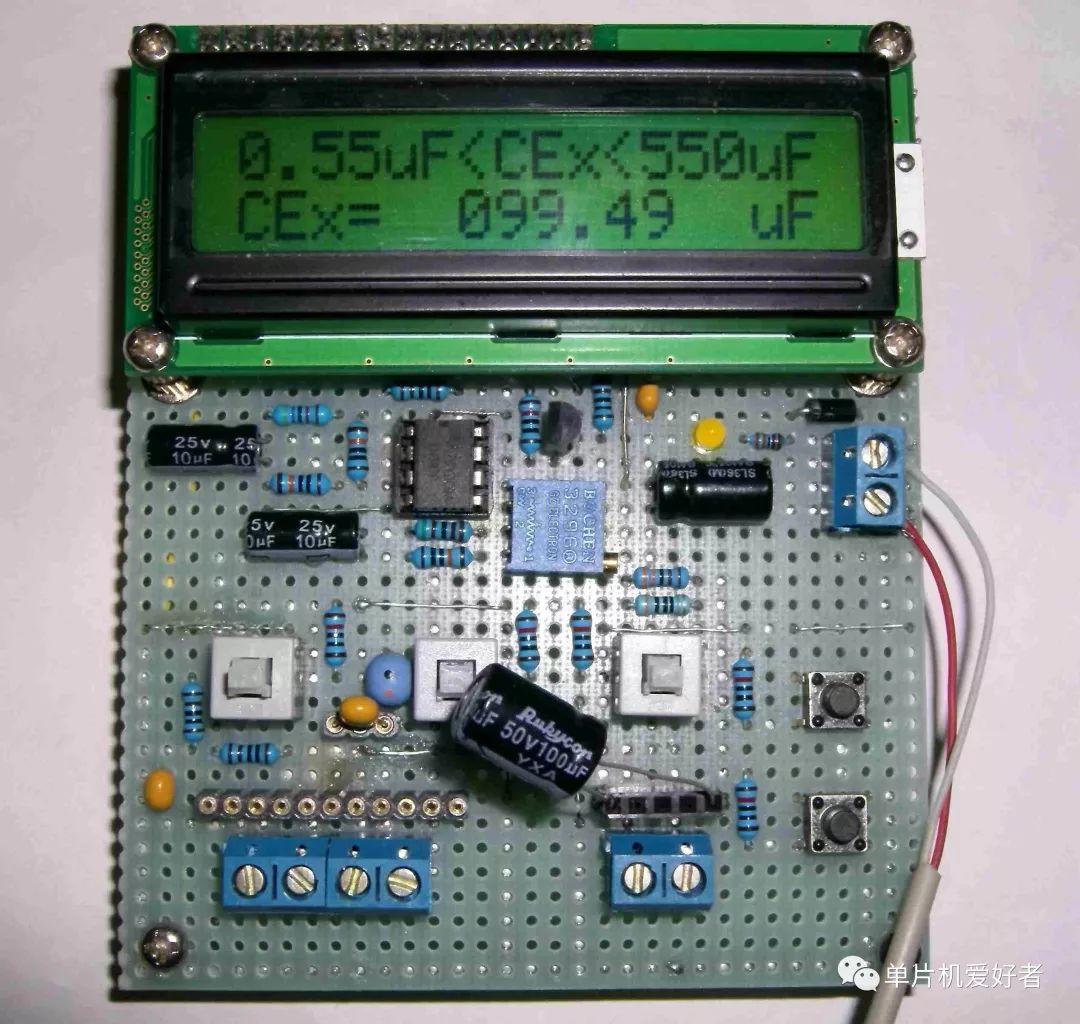
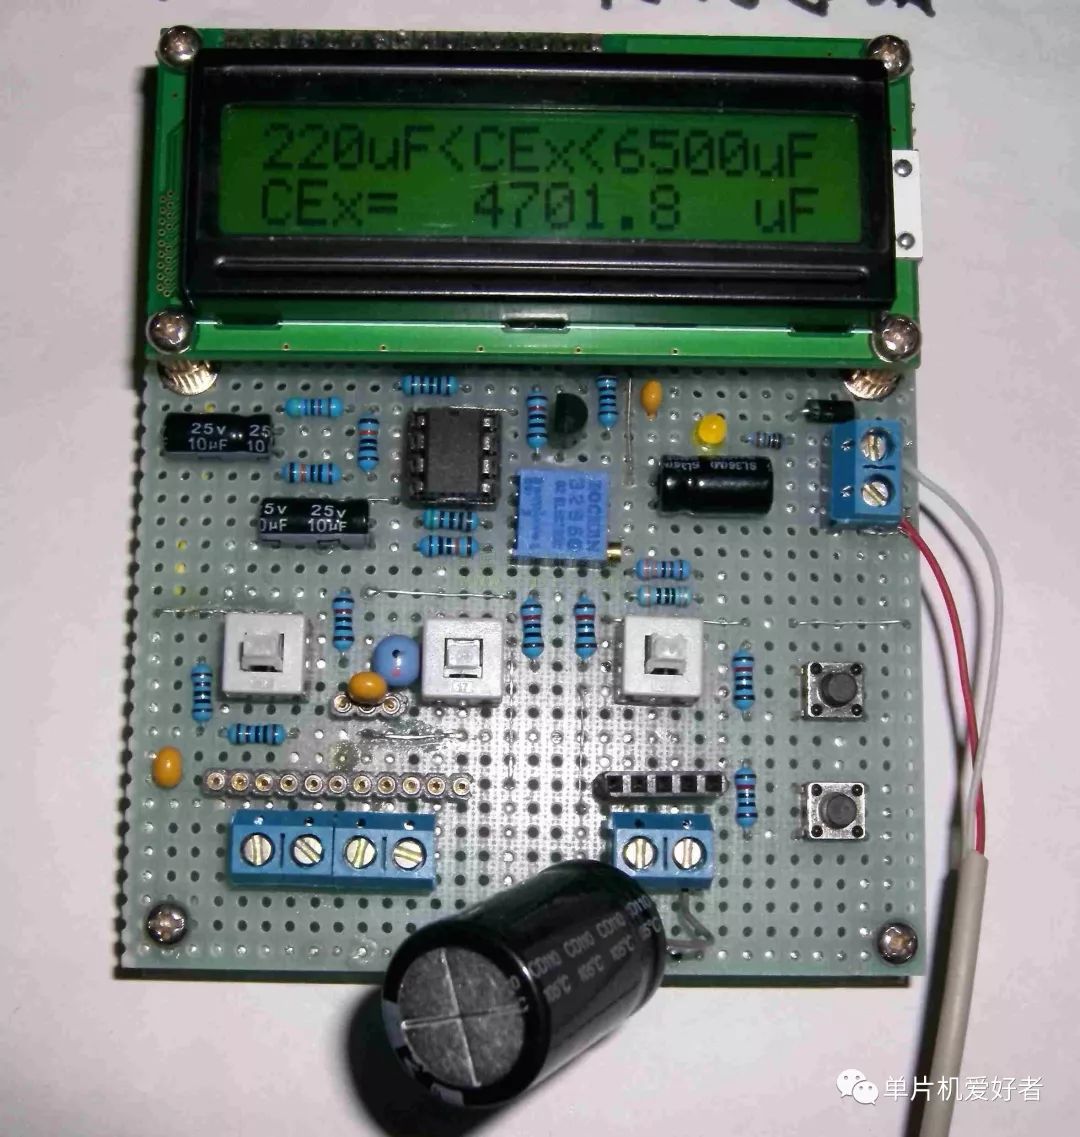
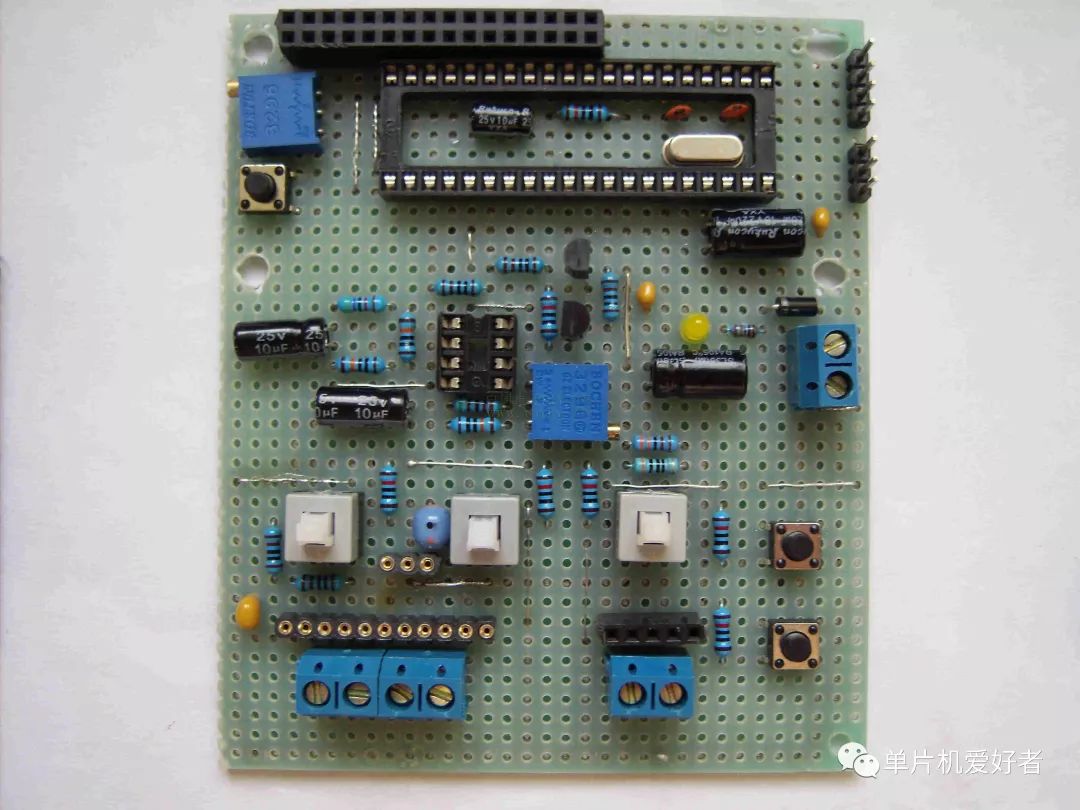
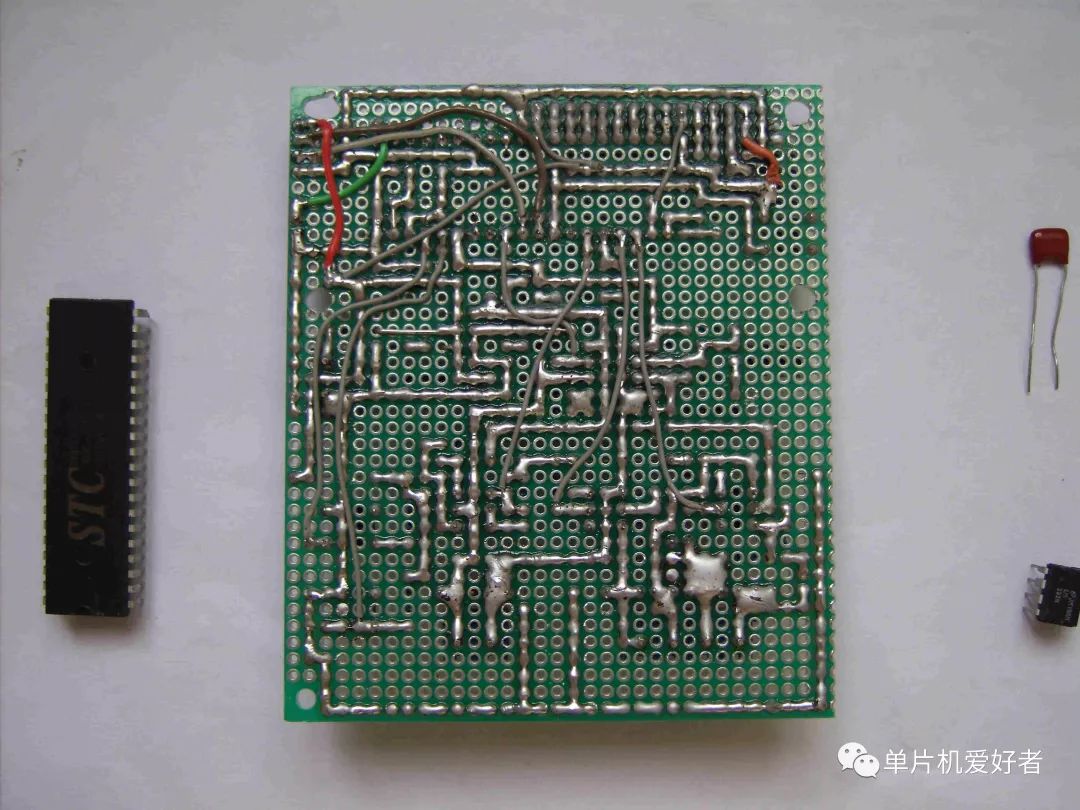
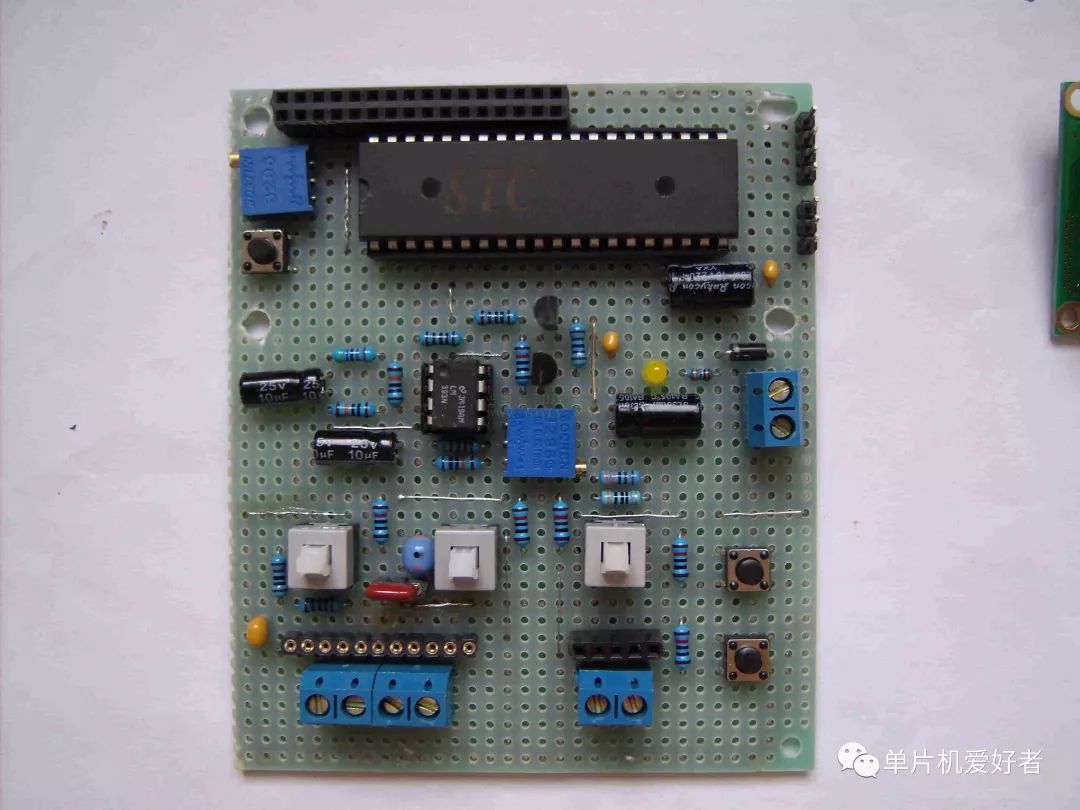
Inductance, capacitance, frequency measurement table based on STC89C52/AT89S52 Gross measurement range Inductance measurement range: 0.1μH-----1H small capacitance measurement range: 1pF----2.2μF (non-electrolytic capacitor) frequency measurement range: 50Hz---400KHz (measured small signal) electrolytic capacitor measurement Range: 0.5μF--12000μF (electrolytic capacitor, non-electrolytic capacitor can be) First, the measurement principle 1, small capacitance, inductance measurement principle: The circuit is an LC oscillator composed of LM393 (U3A). The frequency F1 of the LC oscillation circuit is measured by the single chip microcomputer, and then the value of the inductance L1 is obtained according to the standard capacitance C1 [Cref in the schematic diagram]. Here, the accuracy of the capacity of the capacitor C1 basically determines the accuracy of the entire measurement process. Capacitors with high stability and high precision should be used. Mica capacitors are generally recommended on the Internet. If they are not available, monolith or CBB can also be used. The values ​​of capacitor Cx and inductor Lx are calculated by the following equations: Among them, F1 is the natural frequency, and F2 is the frequency after the test capacitor and inductor are connected. 2, electrolytic capacitor measurement principle: Electrolytic capacitance measurement is based on the calculation of the time constant of the RC circuit, the charging speed of the capacitor is related to the size of R and C, the greater the product of R and C, the longer the charging time. The product of this RC is called the time constant τ of the RC circuit, that is, τ = R ∙ C. If the unit of R is in ohms and the unit of C is pulled, the unit of τ is seconds. The graph shows the general rule of the charging process: Uc rises exponentially, Uc starts to change faster, then gradually slows down, and slowly approaches its final value. When t=τ, Uc=0.632E ( E is the power supply voltage); the measuring instrument is the time when Uc=0 to 0.632E is measured by the single-chip microcomputer, and the measured capacitance value is calculated by the following formula: In the above figure (please refer to the PDF schematic), Btn1 is the reset button of the MCU; Btn2 is the calibration button, which can be pressed to clear the display at any time when measuring the small capacitance; Btn3 is the function switching button for measuring the LCF (frequency, small) Switch between capacitor, inductor) and measuring electrolytic capacitor. The three double-pole double-throw switches in the figure are used to switch measurements. S1 switches between L and C (small capacitors), S2 switches between frequency and LC, and S3 switches between large and small electrolysis. The type of measurement is automatically determined according to the state of the switch and the button Btn3. In addition, Fx, Cx, and Lx share a GND terminal. The four terminals on the board are close together. You can also add GND terminals. They are not shared. The wiring can be handled flexibly according to actual conditions. Third, the circuit board Comparator peripheral components are more, the wiring may not be convenient, to provide you with a reference to the location of the LM393 peripheral components, such a layout flying line will not be too much. The flying lines on my circuit board are mostly because of the strict isolation between the analog power supply and the digital power supply. Actually, it is not necessary, but the power supply and ground near the LC oscillation circuit must be carefully isolated. Otherwise, the small capacitance reading may be very good. Unstable! The standard capacitor Cref is best to use 2200pF mica capacitor. The accuracy of this capacitor directly determines the measurement accuracy of small capacitors and inductors! (However, it does not affect the frequency and electrolytic capacitor measurement accuracy.) Rref debugging method, as mentioned in the above principle, the comparator non-inverting input terminal voltage Uc=0.632E (supply voltage). Fourth, the use method Measuring small capacitance, inductance, frequency is a set of functions, specifically to determine which is determined by the state of S1/S2, the microcontroller can automatically identify which one to measure according to the state of S1/S2. Measuring large electrolytic capacitors and small electrolytic capacitors is a group, the specific measurement of large electrolytic or small electrolysis is determined by the S3 state, the single-chip microcomputer can automatically identify the large electrolytic or small electrolysis according to the state of S3. A function switching button (Btn3 in the schematic) is required between these two sets of functions to switch. 1. Power-on boot interface Display China Electronic DIY Home Website and Avenue must be a member number. 2. Before the small capacitor and the inductor are turned on, the S1/S2/S3 are in the pop-up state. When the S1/S2 is in other states, the other measurement interfaces (the frequency Fx or the inductance Lx measurement interface) are automatically displayed. The 3.7pF in the figure is an uncalibrated error. Generally, this value will be large and must be calibrated to measure small capacitance and inductance. Frequency and electrolytic capacitance measurements do not require calibration, and calibration is only for small capacitance and inductance measurements. 3, small capacitors, inductors calibration calibration only need to be in the small capacitor file (interface in the figure), when the measurement capacitor is not connected, press the calibration (clear) button (Btn2 in the schematic), Cx will automatically clear (shown below). In the inductor file calibration, it is necessary to short the terminal Lx of the measuring inductor to GND, and then press the calibration button. Because it is inconvenient, it is not recommended to calibrate in the inductor. In the small capacitor file and the inductor file calibration is equivalent, after the small capacitor file calibration, press S1 to measure the inductance, no need to repeat the calibration. 4, measuring small capacitor S1/S2 are in the pop-up state, the microcontroller will automatically display the small capacitance interface, unless the function switch button (schematic Btn3) is pressed to switch to the electrolytic capacitor file. After calibration, connect the small capacitor directly between Cx and GND, as shown in the figure below. The first line shows the measured capacitance value and the second line shows the frequency of the current LC oscillation circuit. 5, measuring inductance S1 press, S2 bounce state, the microcontroller will automatically display the measured inductance interface, unless the function switch button (schematic Btn3) is pressed to switch to the electrolytic capacitor file. Connect the inductor between Lx and GND as shown below. The first line shows the measured inductance value and the second line shows the frequency of the current LC oscillator circuit. The measured inductance is the same as the one on the board, nominally 100uH. 6. Measuring frequency Press S2 (whatever state of S1 is irrelevant), the MCU will automatically display the measuring frequency interface, unless the function switching button (schematic Btn3) is pressed to switch to the electrolytic capacitor file. The measuring instrument can measure signals with small amplitude, the frequency measurement range is 50Hz to 400KHz, and the measurement accuracy is within 0.2%. This is the interface for measuring 20KHz signals. 7. Measure the small electrolytic capacitor in any state of small capacitance, inductance and frequency. Press the function switching button (Btn3 in the schematic) to switch to the state of the electrolytic capacitor, and then automatically according to the state of S3 bounce or press. Identify large electrolytic or small electrolytic capacitors. Pressing the function switch button (Btn3 in the schematic) again will return to the state of measuring small capacitance, inductance, and frequency. This is what the function toggle button does. In addition, other measurement gear MCU can automatically recognize according to S1, S2, S3 pressing or bounce, without human intervention. When S3 is bounced, it is a small electrolysis file. The first line shows the measurement range, and the second line shows the measured capacitance value. After the photo is taken, the program is slightly changed, and the displayed measurement range will be slightly different. 8. Measure the large electrolytic capacitor. The function switches to the state of measuring the electrolytic capacitor. When S3 is pressed, it automatically enters the large capacitance measuring interface. After the photo was taken, the program was slightly modified and the measurement range has been increased to 12000uF. V. Other explanations This production can be made by using STC89C52 or AT89S52, and the .HEX file can be directly programmed. If you encounter any problems during the imitation process or have any suggestions for improvement, please leave a message and I will reply as soon as I see it. Attachment: production process display 1, component display 2, the front of the welding is mainly digital power and digital ground, because the digital power and analog power supply are strictly isolated, so the flying line is chaotic. Do not isolate many places and connect them directly. The board can be beautiful. The flying line on the back is mainly the button line, signal detection line, ISP serial download line, etc. The analog part avoids the flying line as much as possible, or uses a short flying line. 3, loading chips and 1602
Panasonic nozzles are used to pick up components from Panasonic SMT feeders and mounting it to pcb. This SMT nozzle is specially designed and compatible to Panasonic pick and place machines. Panasonic nozzles have different types for different Panasonic SMT machine series. The types of Panasonic nozzles include nozzles for CM602 nozzle,NPM nozzle,KME nozzle,BM nozzle ect. For more information about Panasonic nozzles, kindly visit our official website or contact us.
Panasonic Nozzle,Cm Type Nozzle ,Panasonic Bm Type Nozzle,Panasonic Smt Bm Nozzle Shenzhen Keith Electronic Equipment Co., Ltd. , https://www.aismtks.com

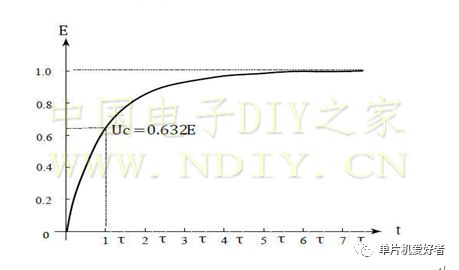
 The circuit is composed of a comparator U1B, discharge transistors Q1, Q2, and the like. Set the positive input terminal of the comparator to Uc, (Uc=0.632E, adjust Rref), and the reverse input terminal is connected to the measured capacitor CEx. When the P15 pin of the microcontroller is low, the capacitor discharges. Note that the pull-in current of the 51 MCU pin is very small, and it is not possible to directly drive Q1, otherwise the discharge time will be very long. When the P15 pin of the MCU is high level, the capacitor is charged. When charging to Uc, the comparator flips and triggers the external interrupt 0 of the MCU. The measured charging time and the size of the charging resistor can calculate the capacitance. Second, the schematic